Unpacking and installation**
1 Unpacking and working environment
Note: after the packing box is in place, please confirm that the robot packaging is intact. If it is damaged, please contact the logistics company and the supplier in the region in time. After unpacking, please check the actual items in the box according to the item list.
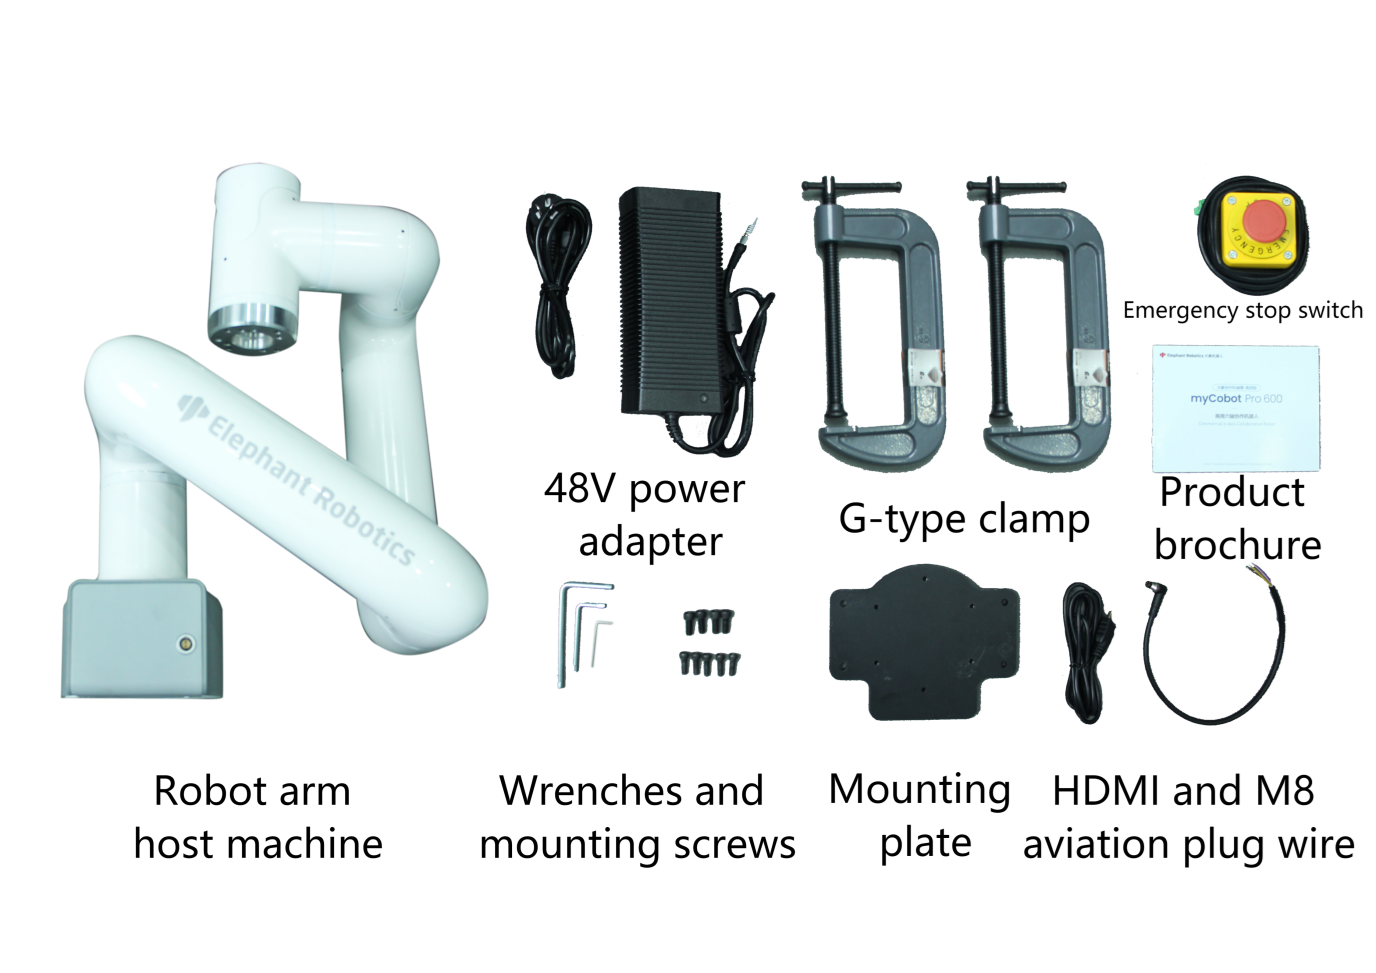
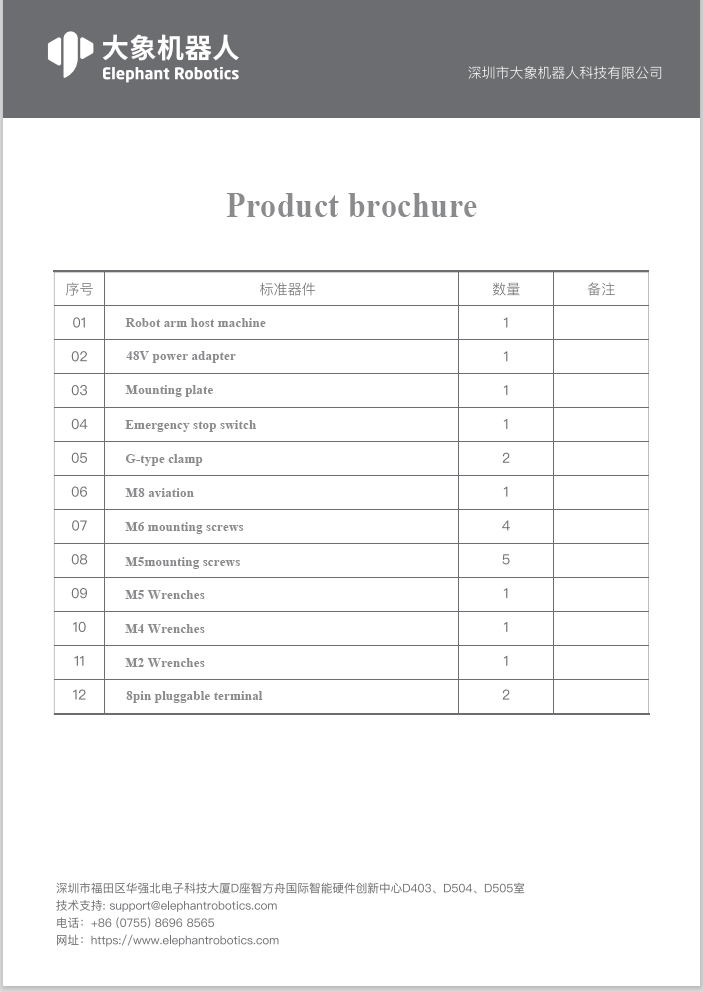
List of product standard sets:
Please set the robot system in an environment that meets the conditions described in the table, so as to give full play to and maintain the performance of the machine and use it safely.
Table 2-3 working environment and conditions
| temperature | 0°C~50°C |
|---|---|
| relative humidity | 20%~70% |
| Indoor and outdoor requirements | indoor |
| Other environmental requirements | - Keep away from dust, oil fume, salt, iron filings, etc. - Keep away from flammable and corrosive liquids and gases. - Do not come into contact with water. - Do not transmit shock and vibration, etc. - Keep away from strong electromagnetic interference sources. |
2 Install the mechanical arm
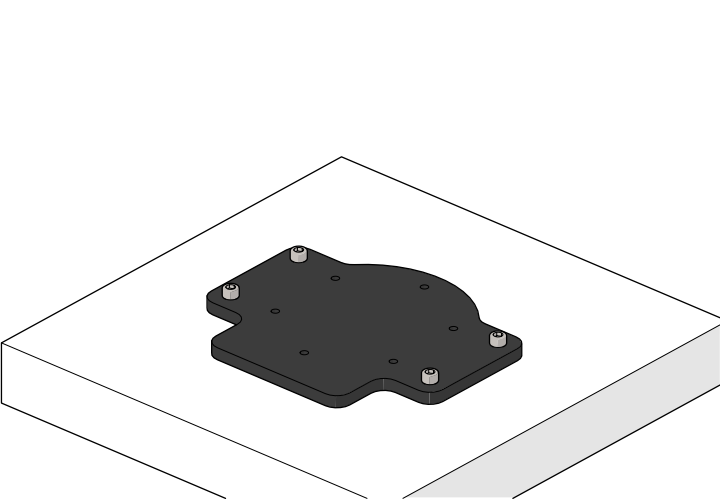
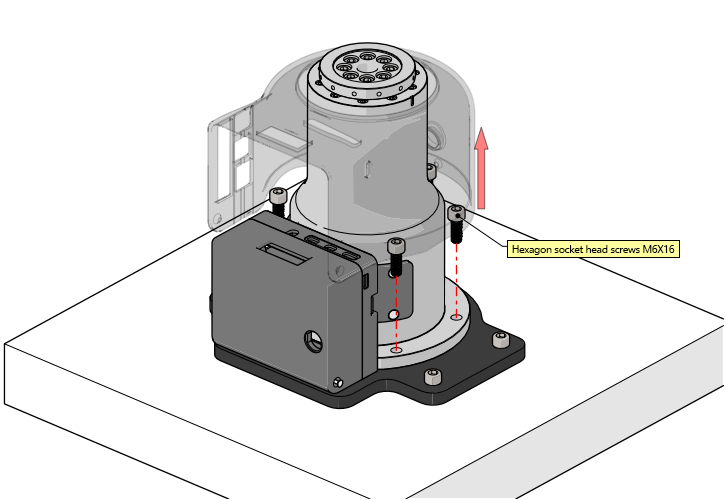
2.1 Install m6x16 screws to fix the base plate on the table

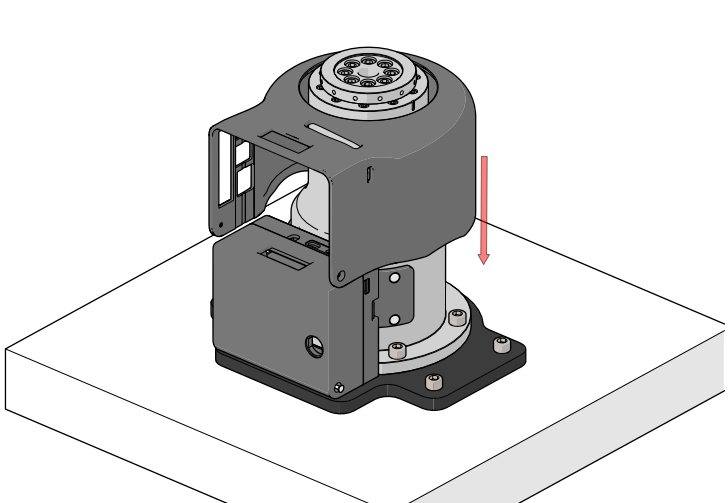
2.2 Renderings after installation
2.3 Place the manipulator base on the fixed base plate

2.4 Remove the fixing screws of the cover on the base of the mechanical arm
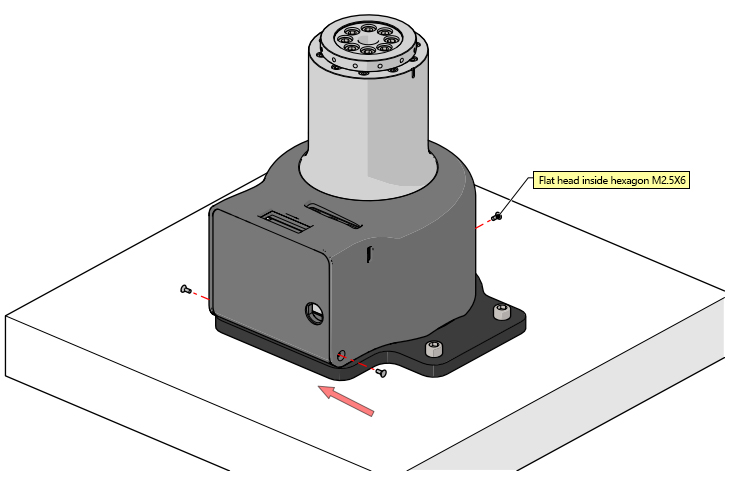
2.5 Open the cover of the manipulator base and fix the manipulator base and base plate with m6x16 screws
2.6 After installation, fasten the cover of the manipulator base
2.7 Install the cover fixing screws of the manipulator base
2.8 Install the cover fixing screws of the manipulator base
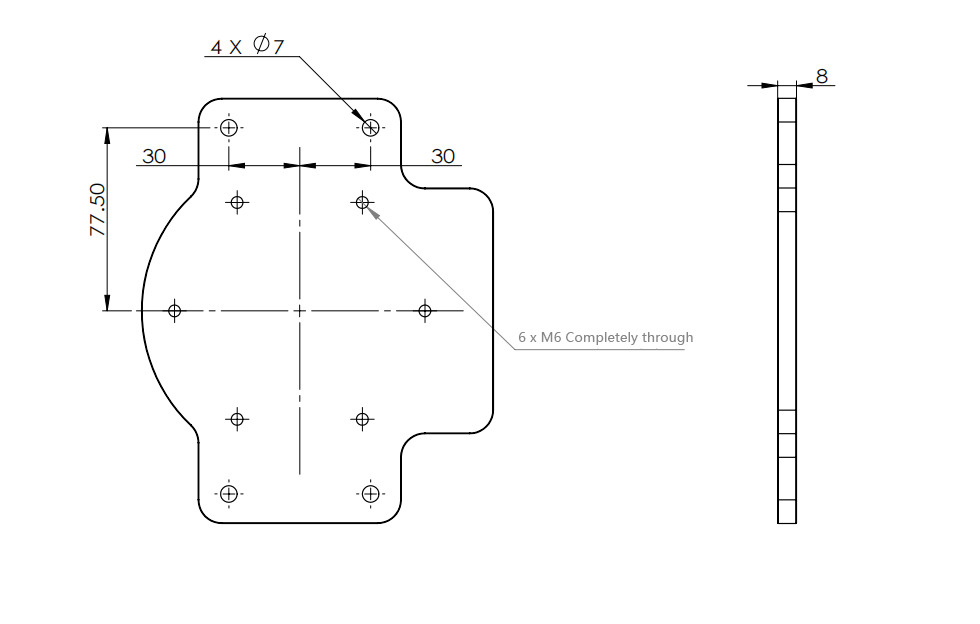
2.9 Bottom plate dimension drawing
3 Display module connection
3.1 Display connection
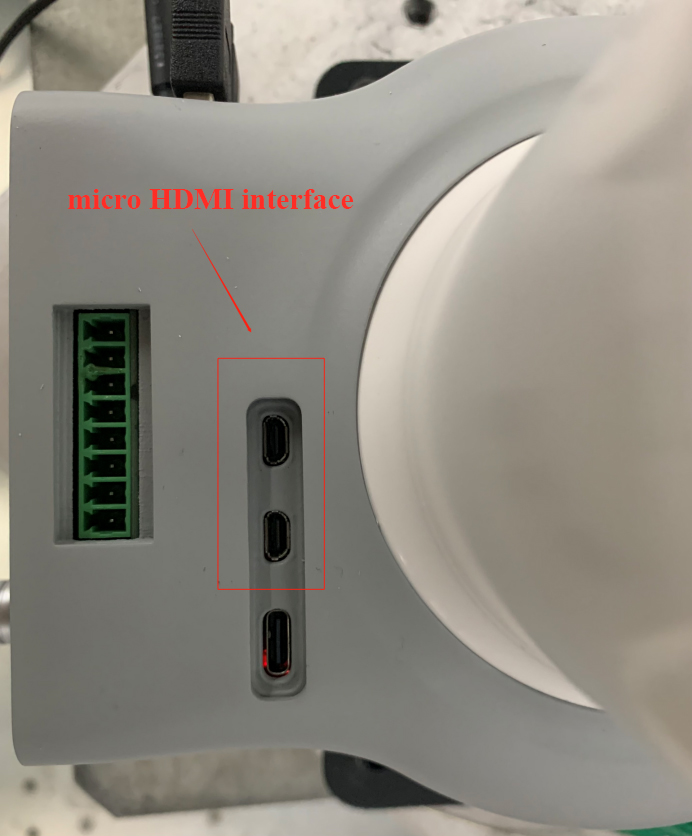
1 Prepare the monitor connecting cable in the accessories, as shown in Figure 2-1. One end is HDMI connector and the other end is micro HDMI connector.
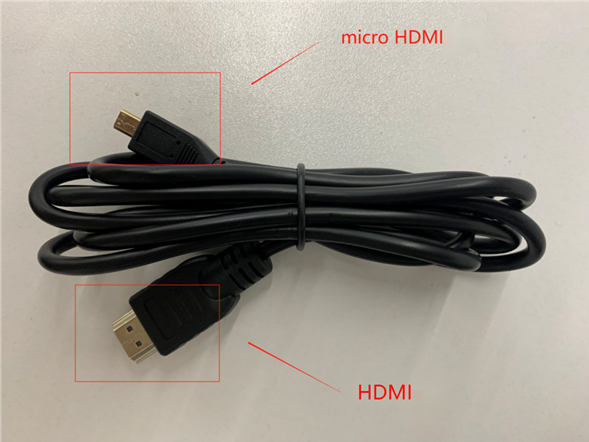
2 The HDMI connector is connected to the computer, and the micro HDMI connector is connected to the robot. The position of the robot interface is shown in Figure 2-2. After connecting, power on the robot to display.
3.2 Remote connection
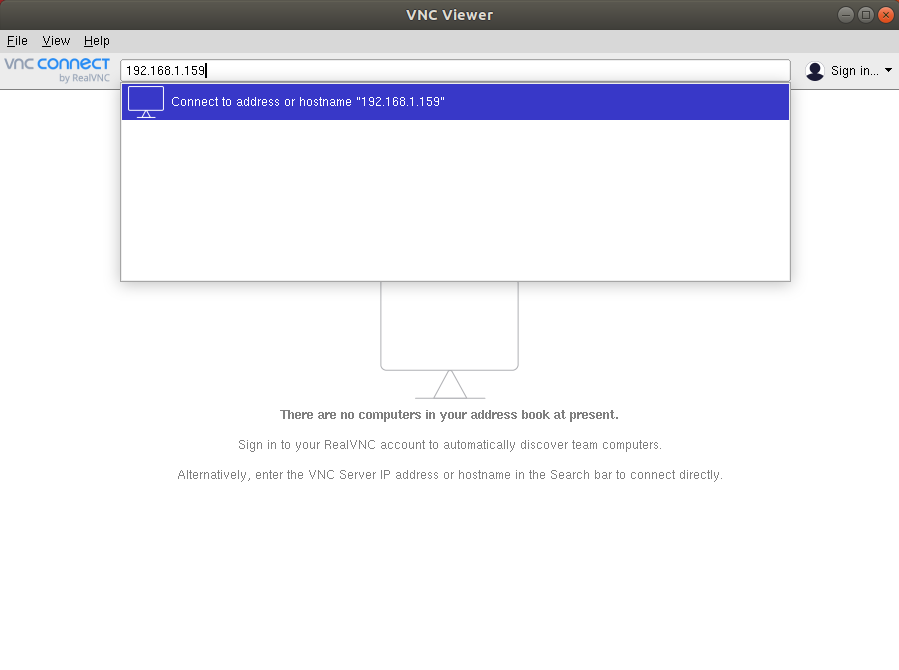
1 Power on the robot and connect the manipulator and PC with network cable. 2 Open the software "VNC viewer" at the remote end, as shown in Figure 2-3, enter the IP address of the robot in the input box, and press enter to connect
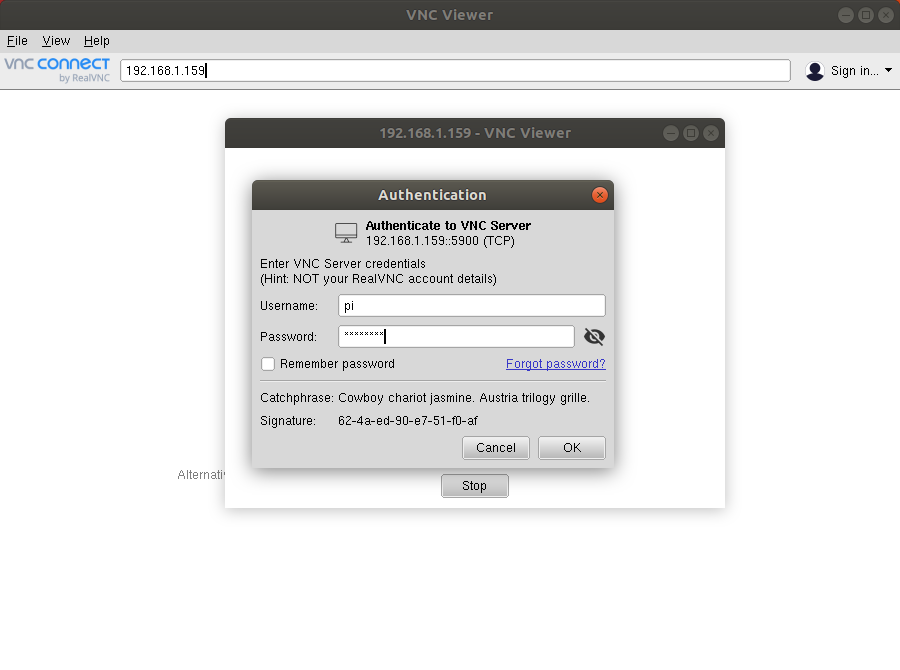
3 As shown in Figure 2-4, in the pop-up authentication window, enter the account number and password of the robot. The default account name is "Pi" and the password is "elephant". After input, click "OK" button to connect
4 Hotspot setup with ipad remote connection
4.1 Set Hotspot
4.1.1、Installing dependencies
sudo apt-get install hostapd dnsmasq haveged
4.1.2、Download and install create_ap
sudo git clone https://github.com/oblique/create_ap
cd create_ap
sudo make install
4.1.3、Turn off wifi (important!!! And forget all available wifi passwords, the whole process to ensure that pi will not connect to wifi)
sudo ifconfig wlan0 down
4.1.4、Enable hotspot
sudo create_ap -n wlan0 <Hot name> <Password>
如
sudo create_ap -n wlan0 chenwifi 123456
4.2 Set up ipad remote operation
4.2.1、Download software
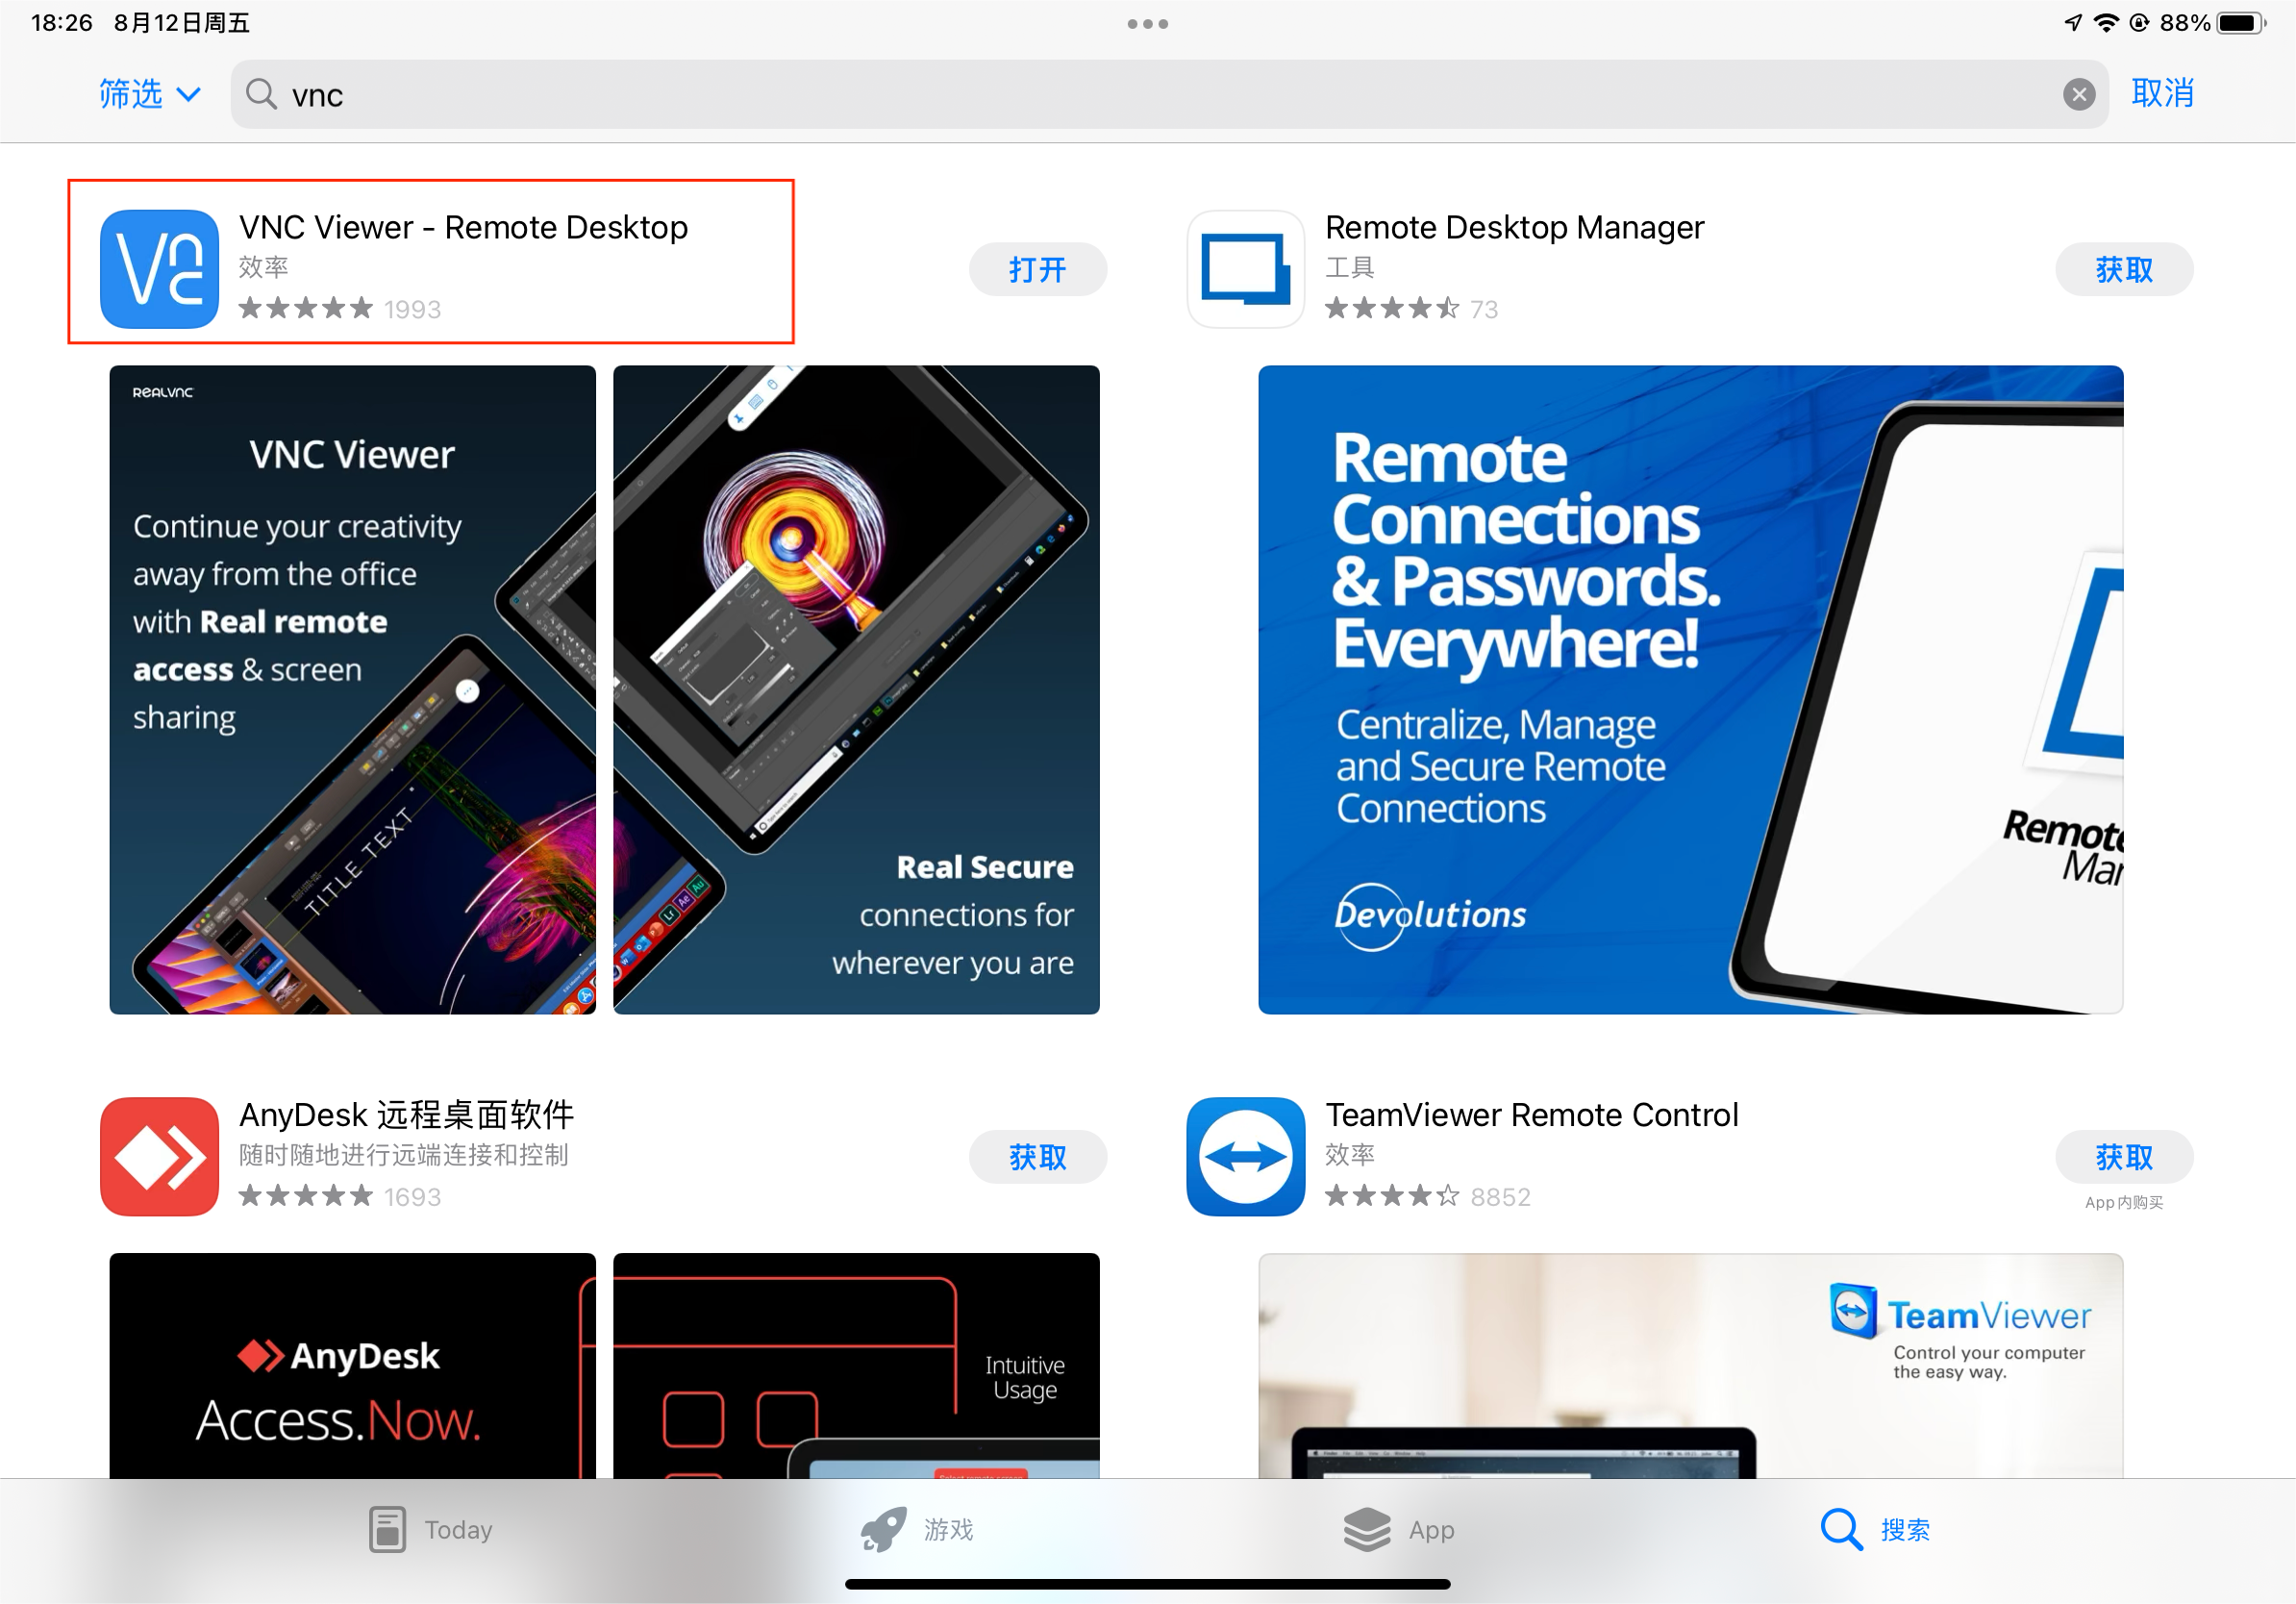
Search for VNC Viewer in the App Store to download and install
4.2.2、Connecting to Hotspots
Connecting ipad to Raspberry Pi hotspot

4.2.3、Add Address
Open VNC Viewer, click on the + sign in the upper right corner, enter the Raspberry Pi ip address (you can query the wlan0 address by typing ifconfig in the terminal), the name can be arbitrary
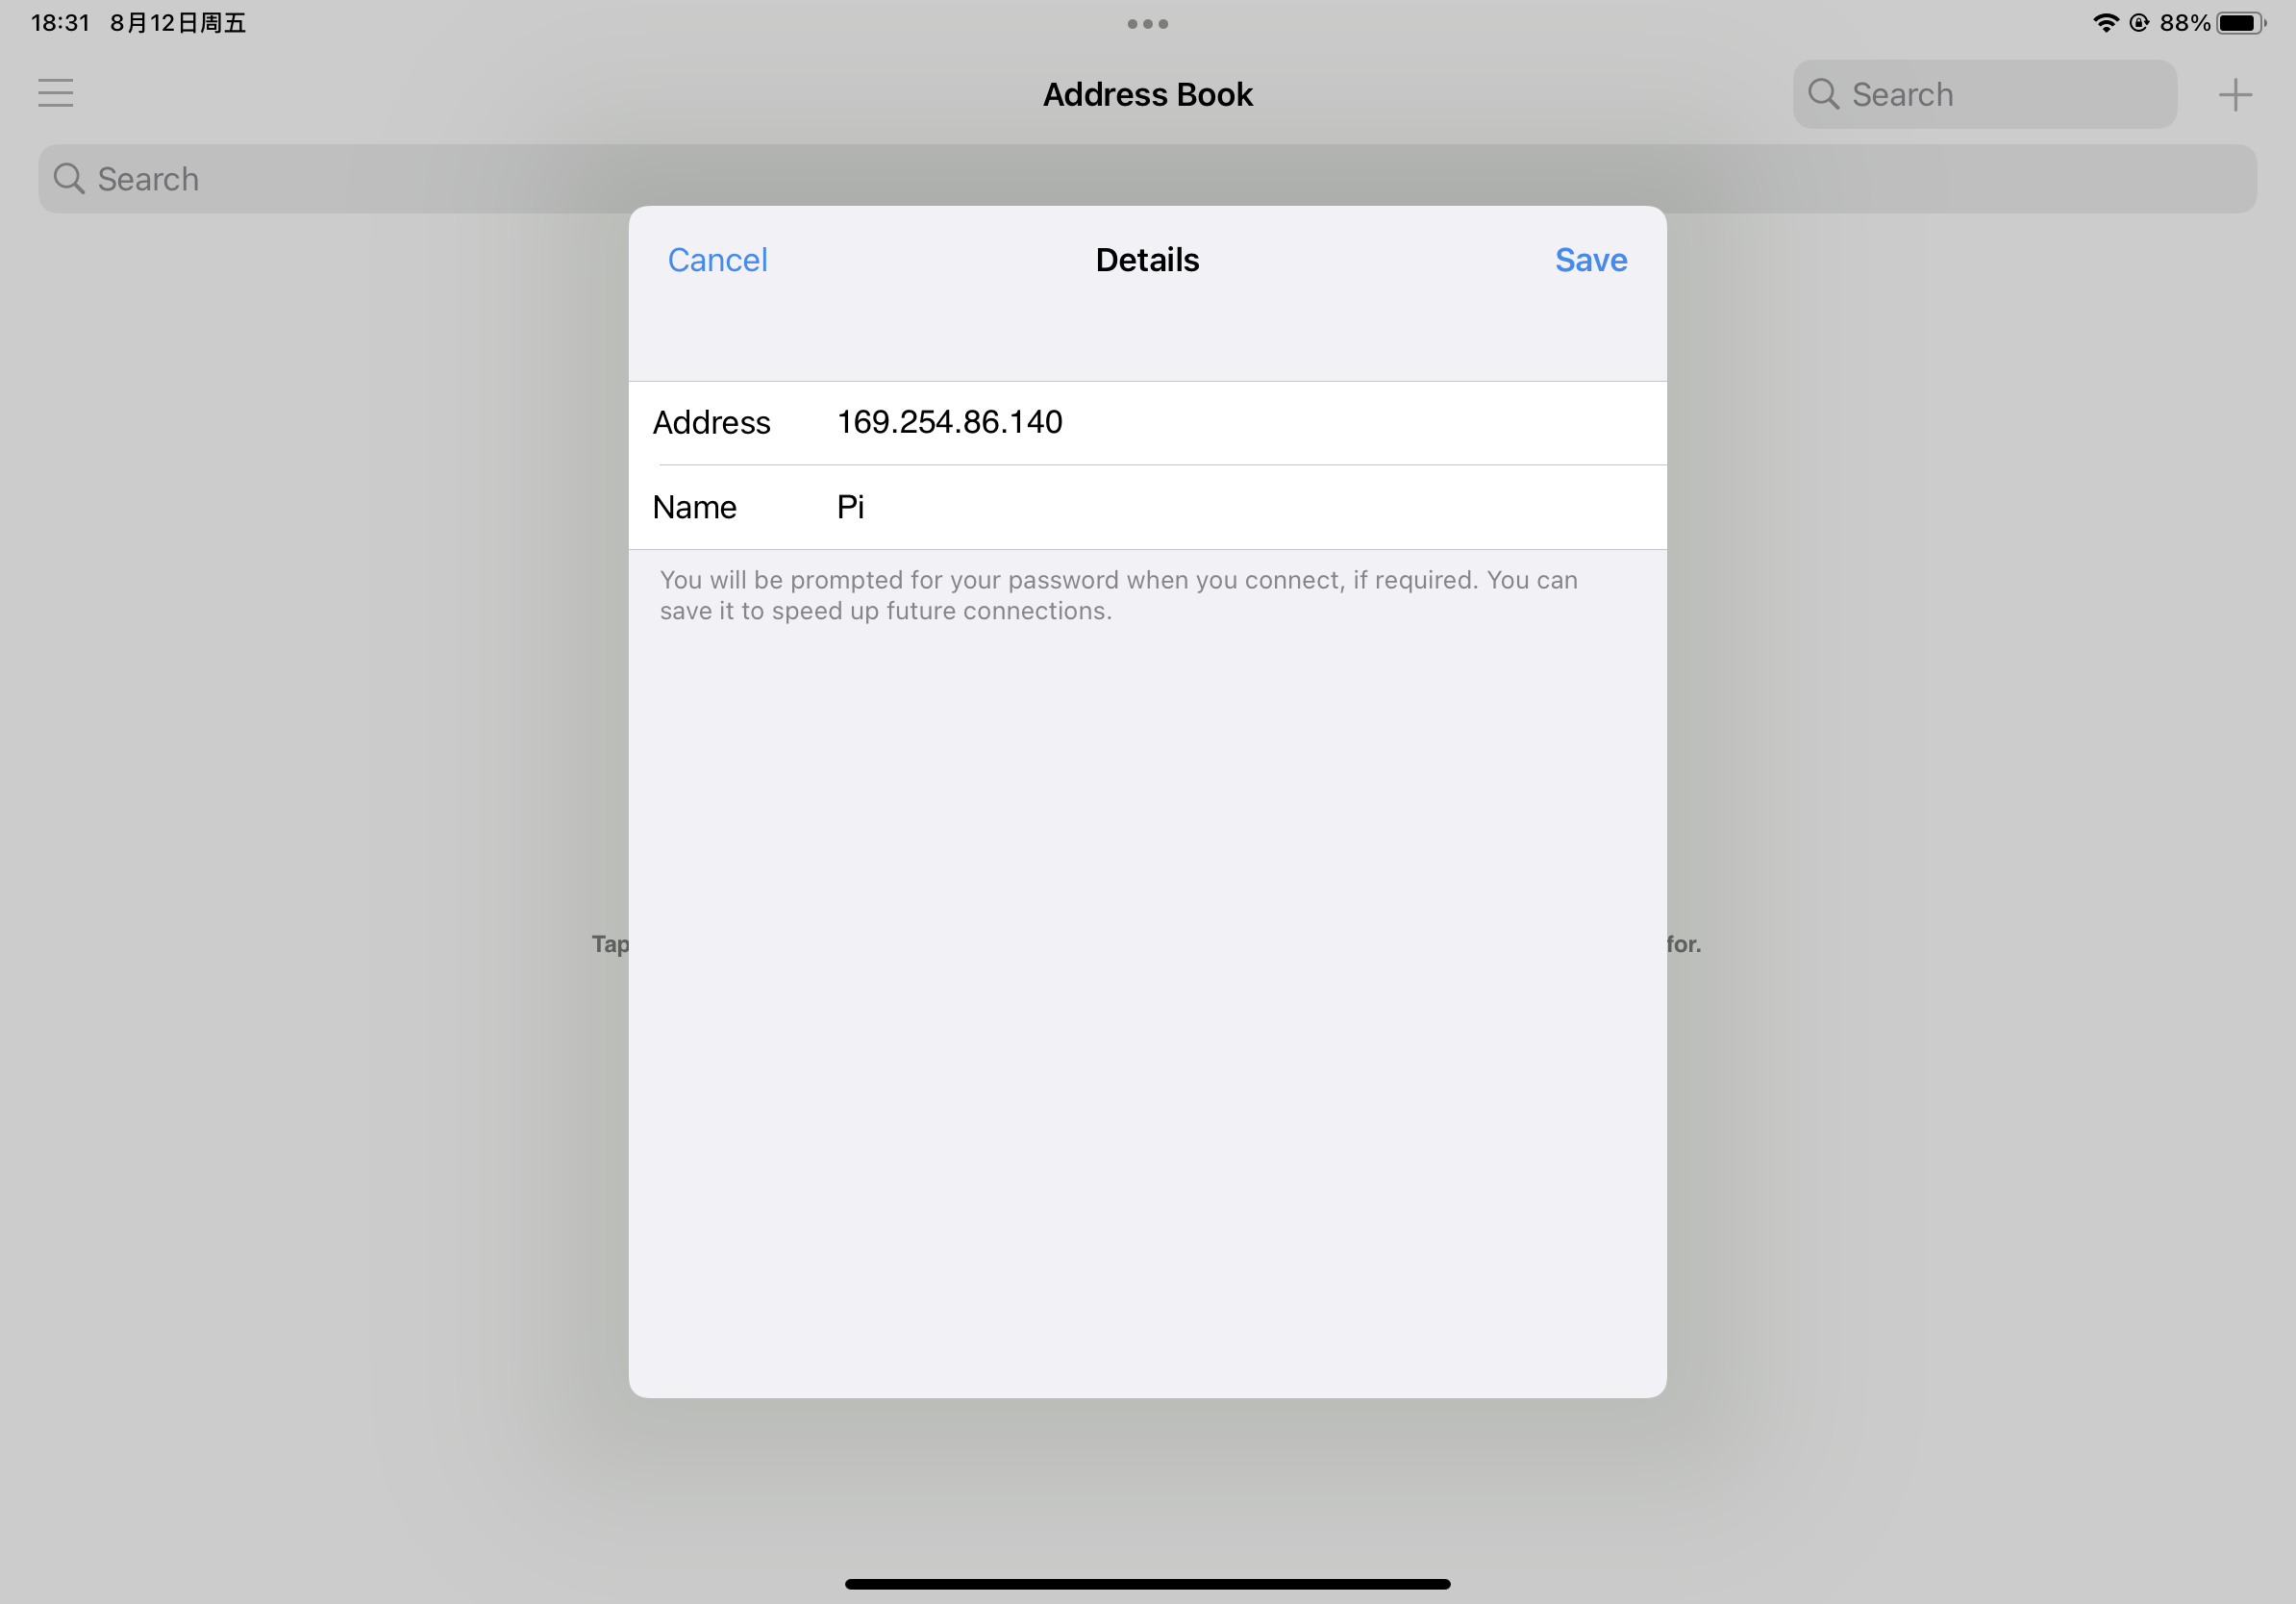
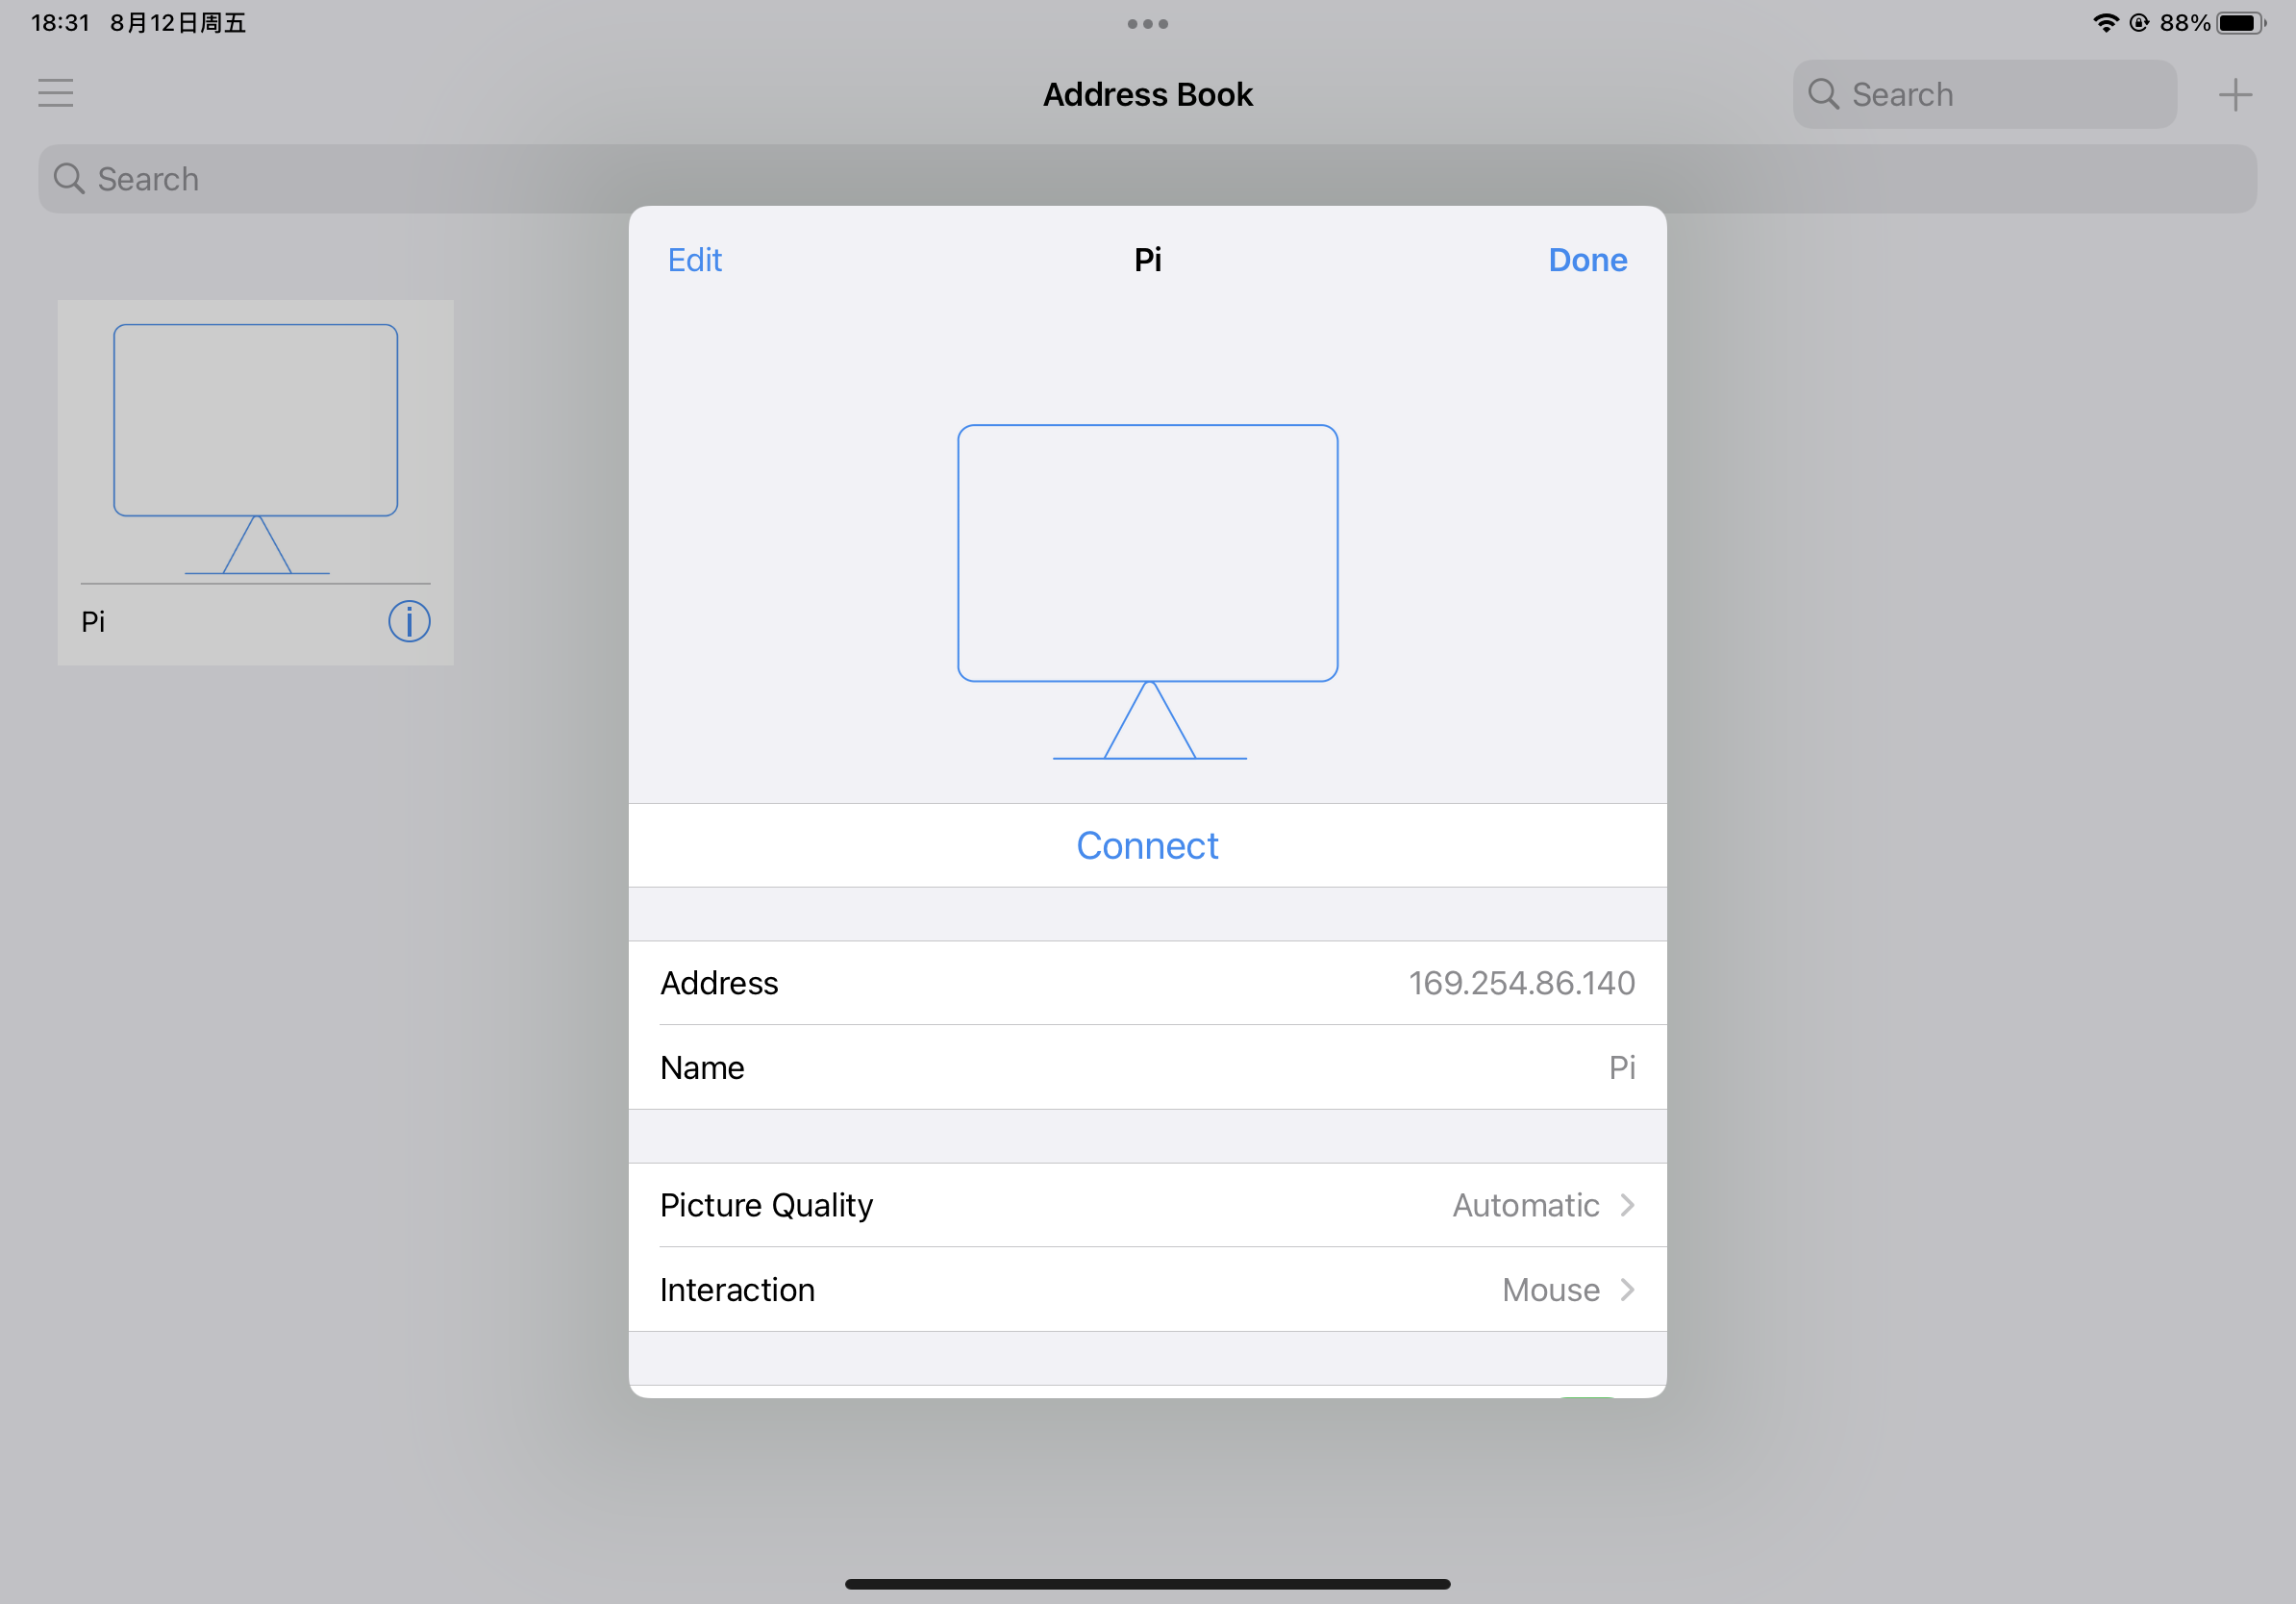
Click Connect
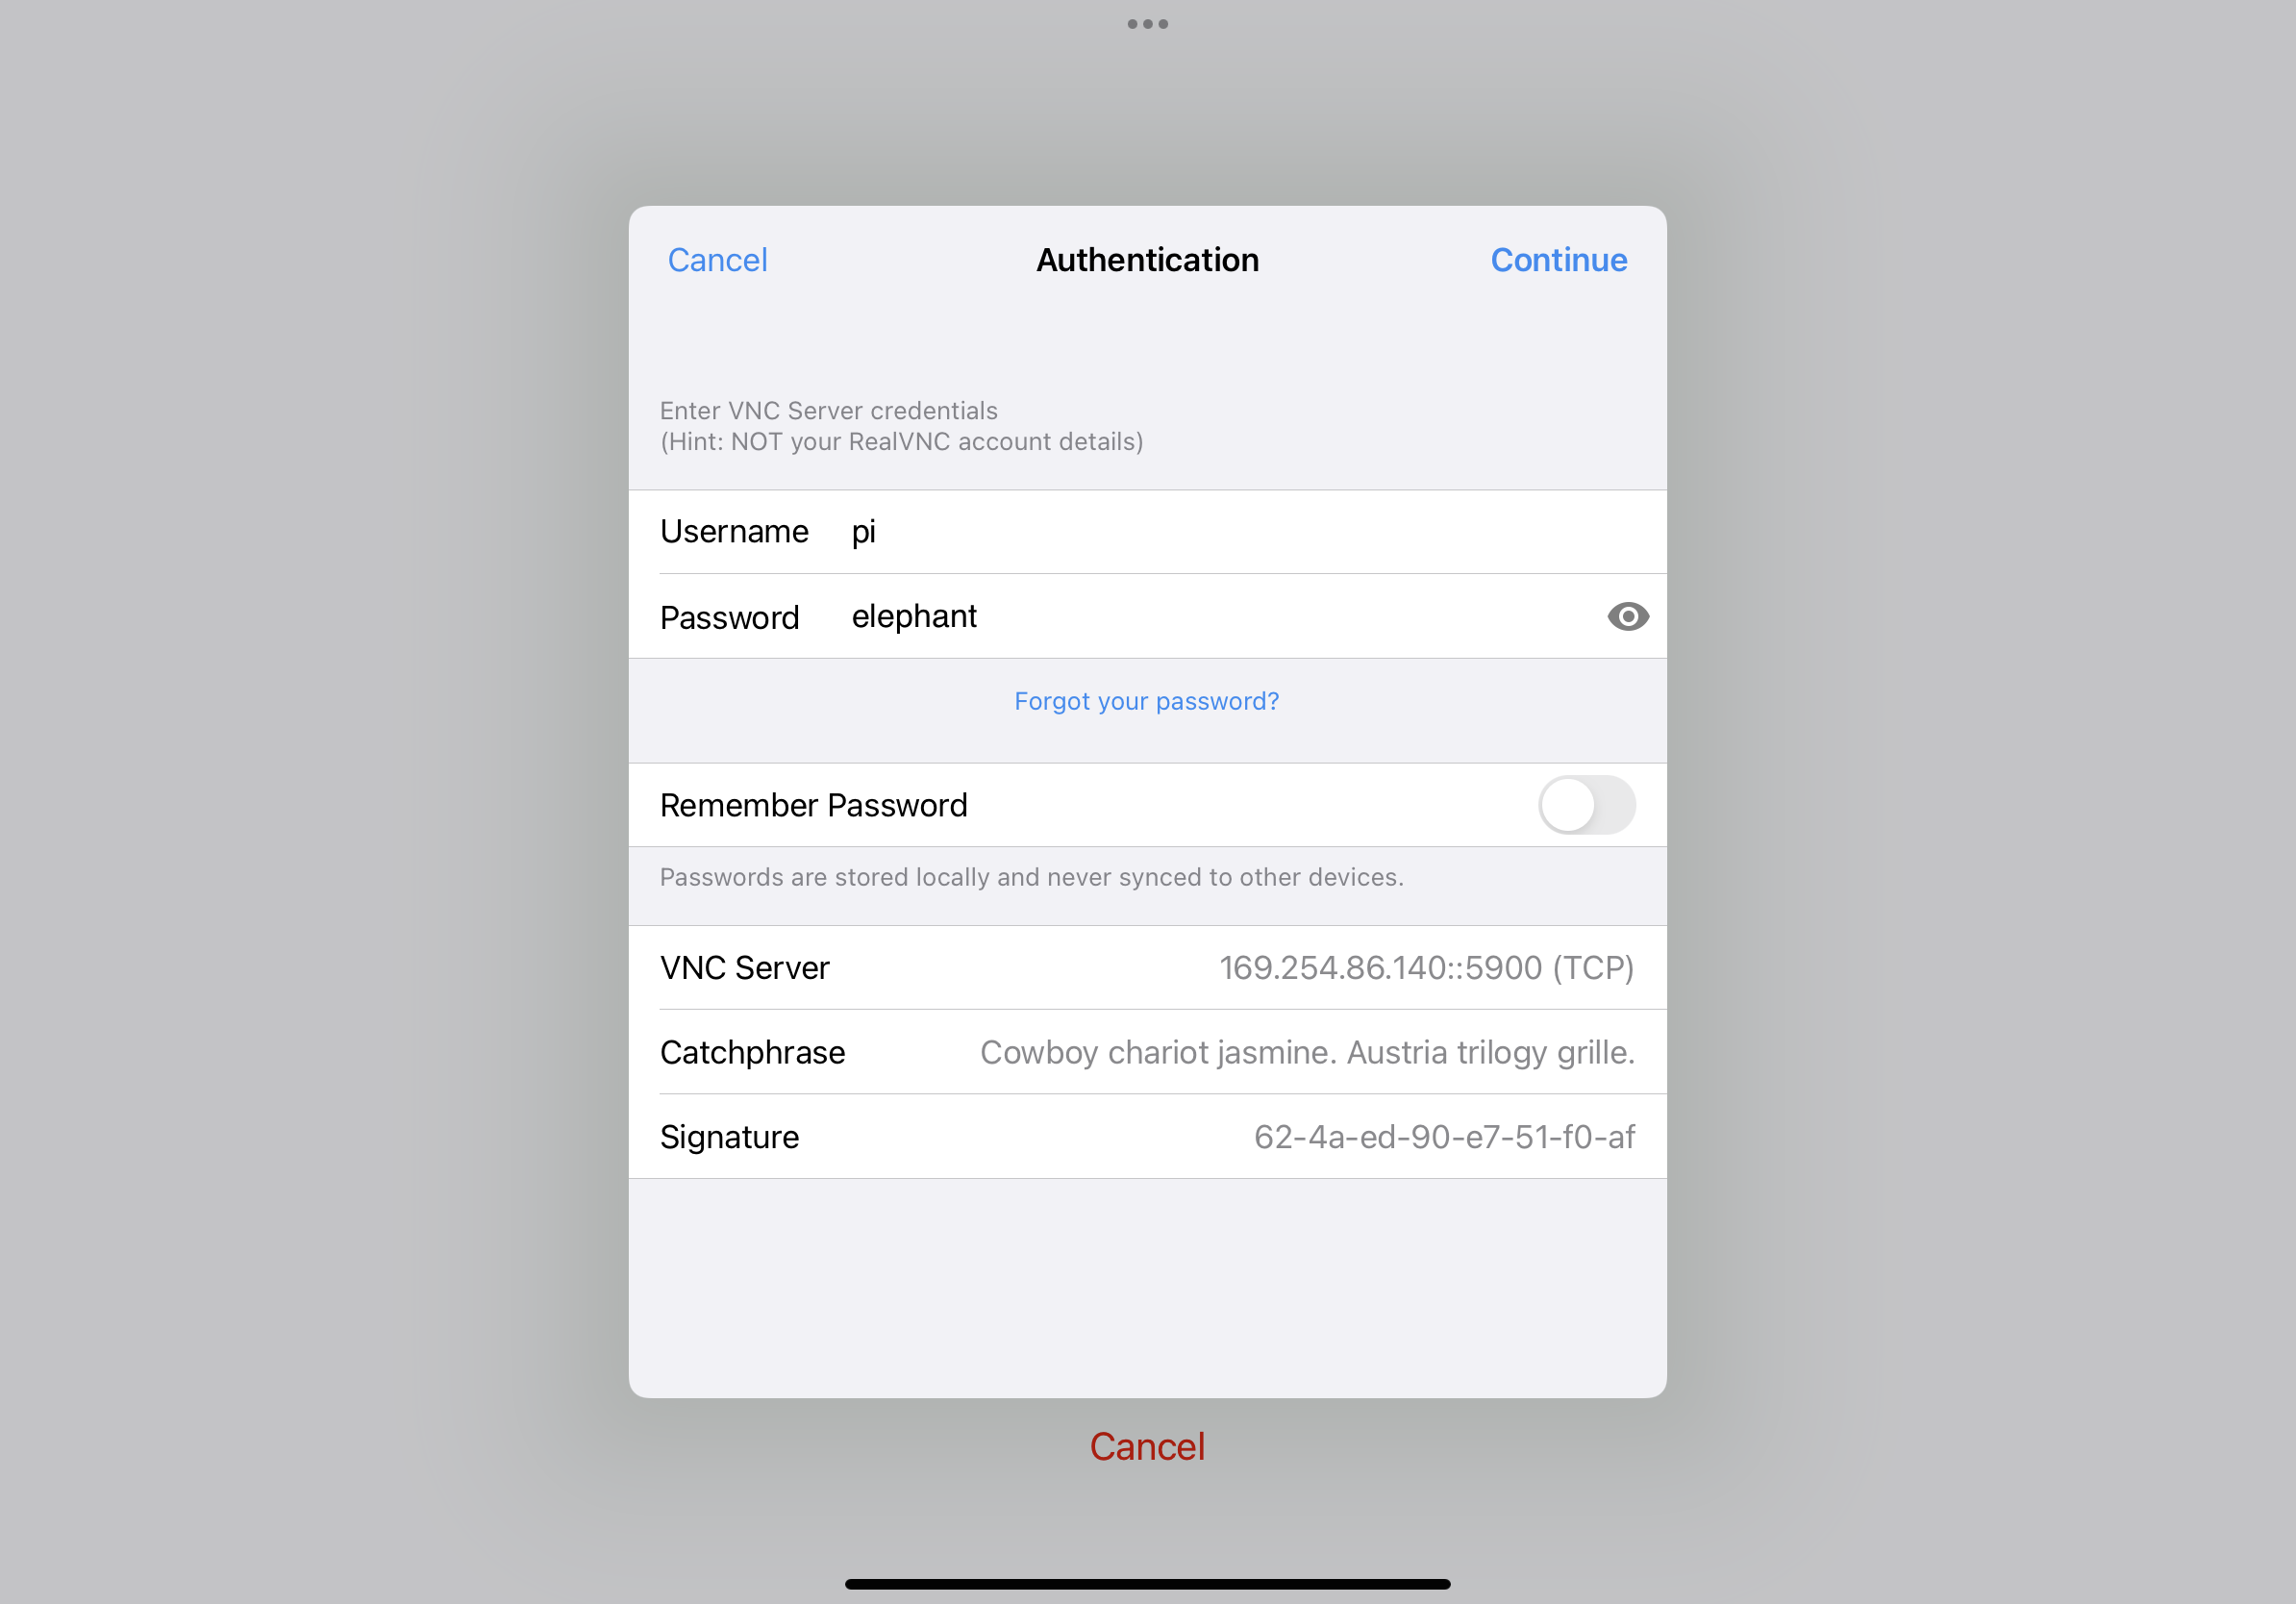
After entering, type pi for user and elephant for password, then click Continue
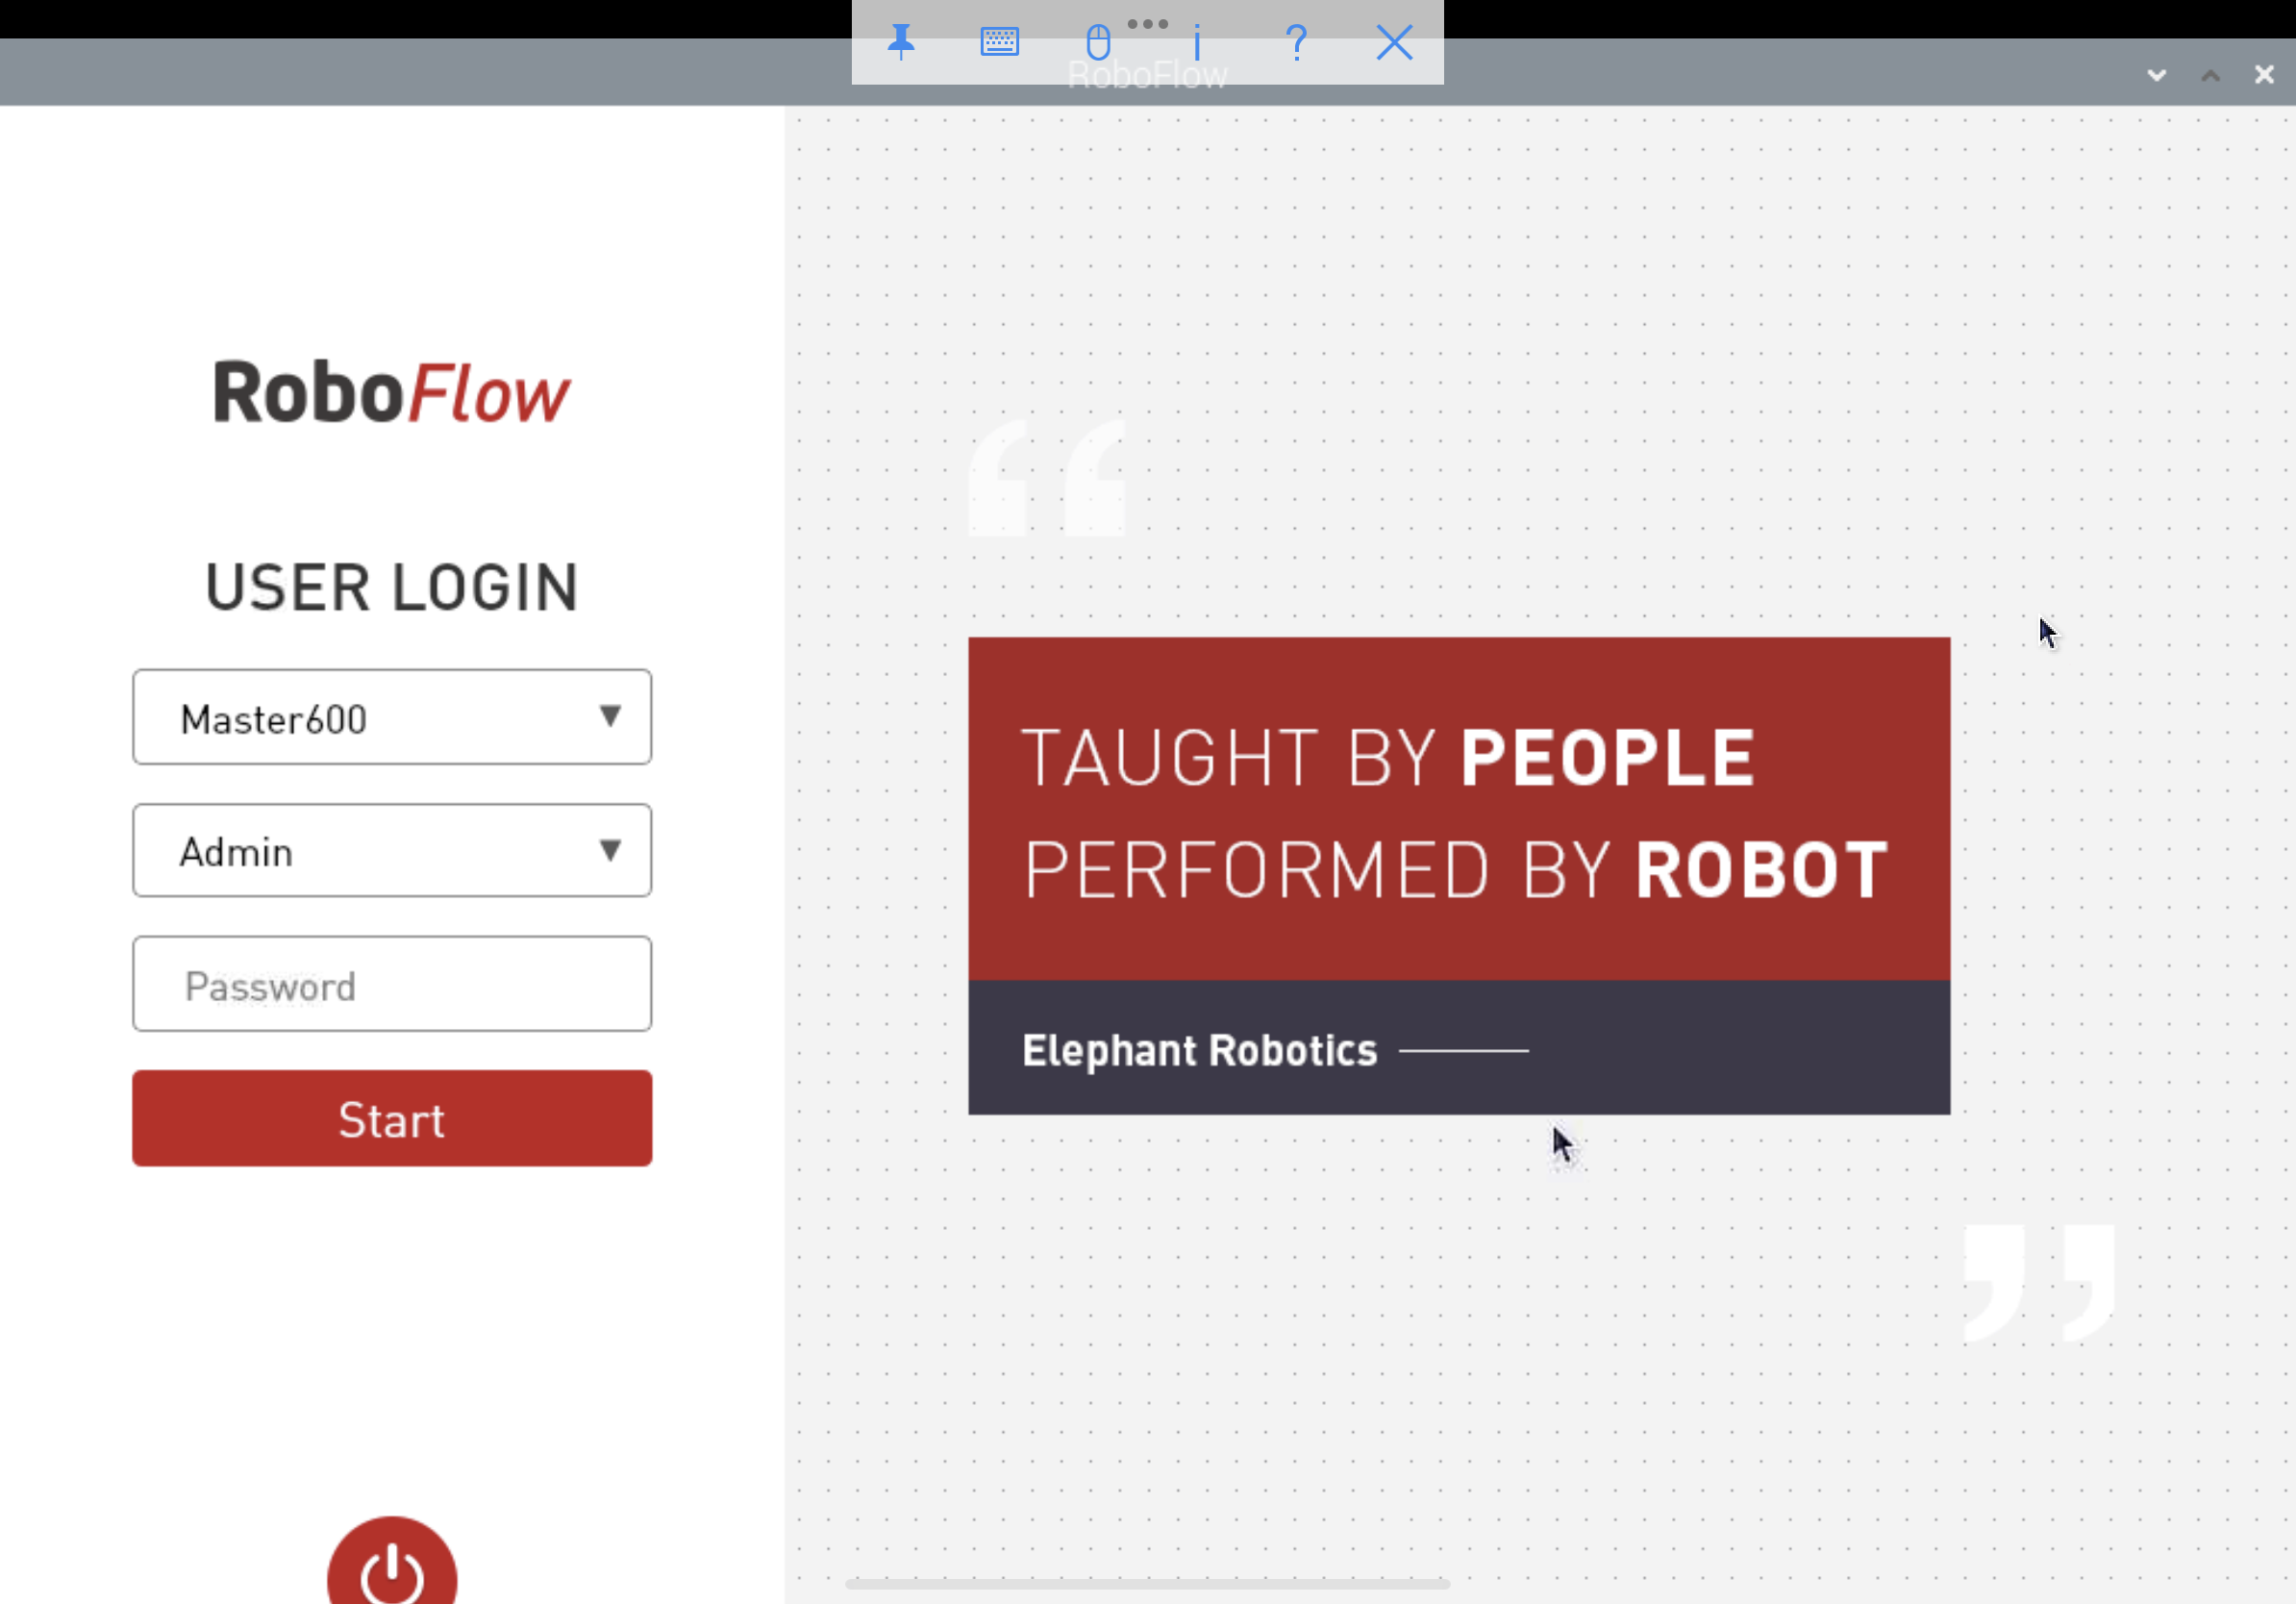
Connect to see the screen and then you can operate
4.3 Cautions
When creating a self-starting hotspot, no matter what the hotspot name is, the display will be MyAccessPoint, but the password is the one you set.
The names of the currently set up self-boot Raspberry Pi hotspots are MyAccessPoint and the password is 12345678